Expona
Context-trained AI agent delivering noise-free, cost-efficient conversational intelligence


 expona
Thanks to its readymade SDK, Silverlight was considered as the best option to display maps on Microsoft Dynamics CRM for a very long time. However, owing to plug-ins requirement and limitations with device compatibility, developers round the globe like me were forced to look for an alternative, more suitable option. And we struck gold…with HTML5! In this post, I am going to demonstrate how to build a simple map component in MS Dynamics CRM with nothing more than HTML5 and JavaScript!
You will need to have a basic idea about how to use Bing maps in HTML and decent hands-on experience of customizing MS Dynamics CRM. You will also require to add latitude and longitude fields under the Address field in Account, Contact and Lead entities.
So let’s get rolling!
We are going to build a map for three of the most-used entities in MS Dynamics CRM: namely Account, Lead & Contact. We need to display all the records for these entities within our map.
Take a look at the image shown below where all accounts are displayed on the map in the form of Bing map pushpins, accompanied by a hover effect, which provides more details of the selected account.
This is a 6-step process:
Get the base URL for accessing the application data, as shown below.

Next, you need to create the request query for accessing the latitude and longitude of all Accounts, from the Account entity itself. I used the following Query:

Once you have created the request query ad demonstrated above, you need to make an Ajax call to get the actual data from MS Dynamics CRM with the help of requestUrl used in step 2 above. Pass on this result to another JavaScript function to add the pushpins on the map as shown here.
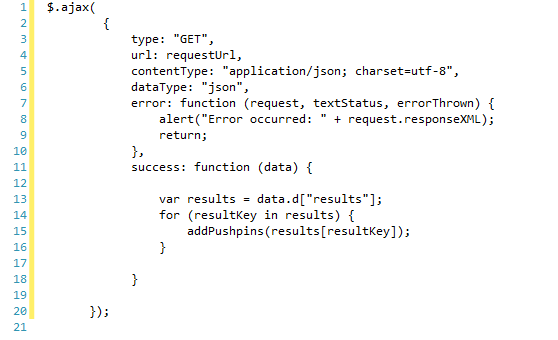
Once you get the data from the Ajax call, you can proceed to adding the pushpins on the map. However, bear in mind that before you start this, you must have initialized the map component on the HTML page. I have demonstrated the same below.
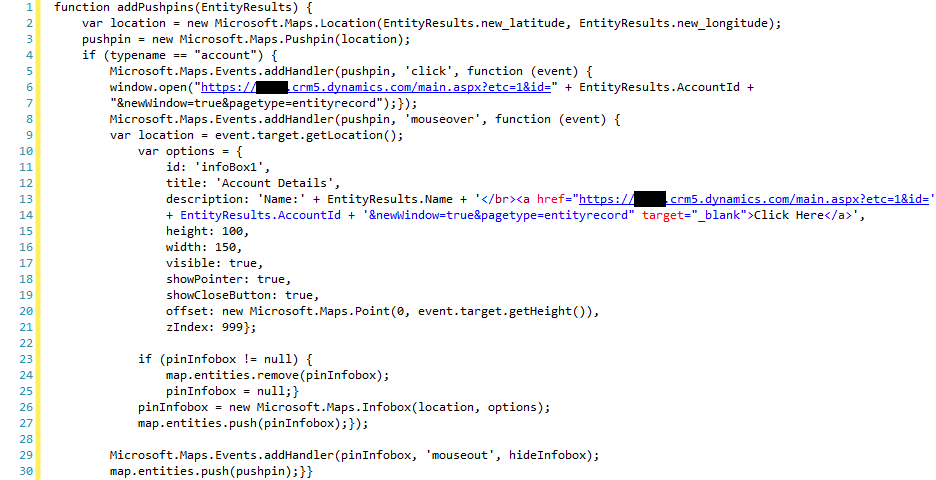
In the code snippet shown above, the click event is added dynamically to perform the click operation for opening the corresponding Account page directly, while the mouseover event is added dynamically to see the details of selected account.
Once this is done, add your all Java Script code to your HTML page, within the body tag.
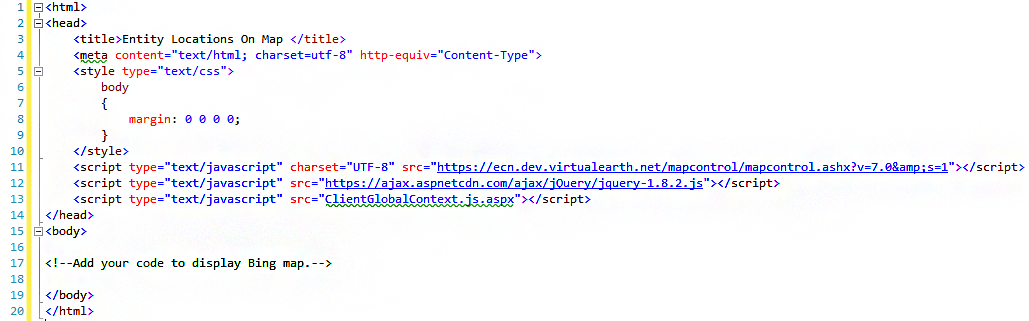
As you can see above, we have added a simple HTML web resource for the map in MS Dynamics CRM. Now you need to upload the web resource to the MS Dynamics CRM and customize the ribbon, in order to access the map resource on the MS Dynamics CRM page.
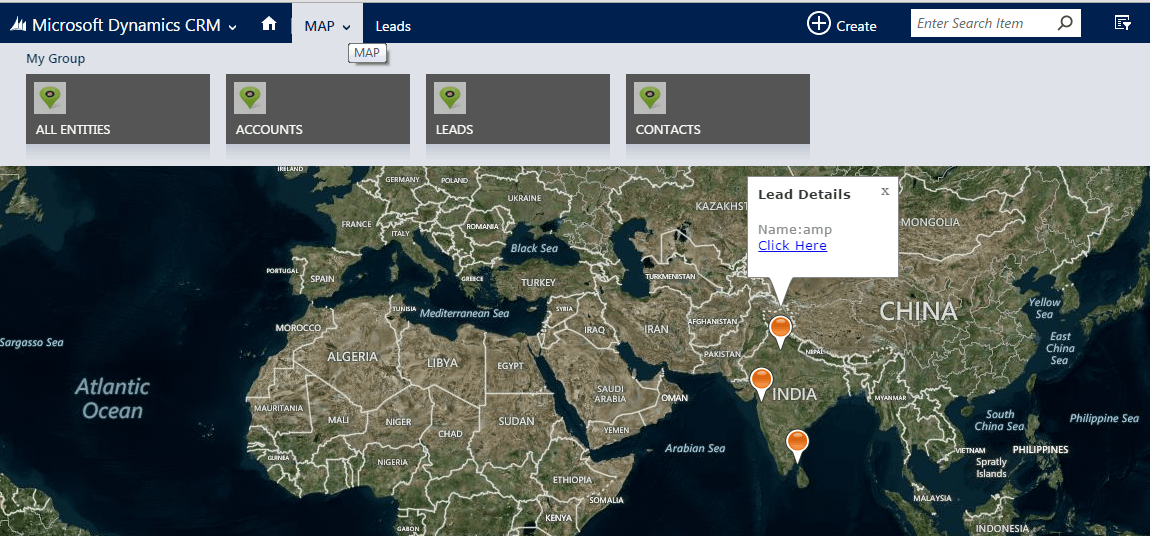
Finally, you need to modify Step 2 for performing the same operation on Contact and Lead entities. You can change this customization to provide a Heat map simply by just changing the map type. You can also use additional Bing map APIs to get direction or route to different entities in MS Dynamics CRM.
For more information, you can refer to https://msdn.microsoft.com/en-us/library/gg328358.aspx

Context-trained AI agent delivering noise-free, cost-efficient conversational intelligence

We offer functional, technical, and implementation support, minimizing disruptions to your operations.

AI or Gen AI, consulting, development or model building. You ask for any of them. We will deliver.
Insights from our team of experts who deliver digital software day in and day out.
 Thank you for signing up!
Thanks a lot for your interest. You are already a subscriber. You will receive your first newsletter soon.